🎓 The basics
Creating a workpaper
We're finally onto workpapers, the main component of Cimplico Workpapers! After completing this lesson you'll be ready to jump into the Creation to Completion course.
Before we proceed with setting up a workpaper, make sure you've read through our What is a workpaper? article for information on what a workpaper is and how they're handled in Cimplico Workpapers.
To see your current workpapers and to create new ones, head to the Workpapers tab in the Firm Management section.
Note
Workpapers can also be created from the entity overview screen shown in Creating entities, and the group overview screen in Creating groups.
Adding a new workpaper
Workpapers can be added from the Workpapers, Group overview, or Entity overview screens by clicking the New Workpaper button.
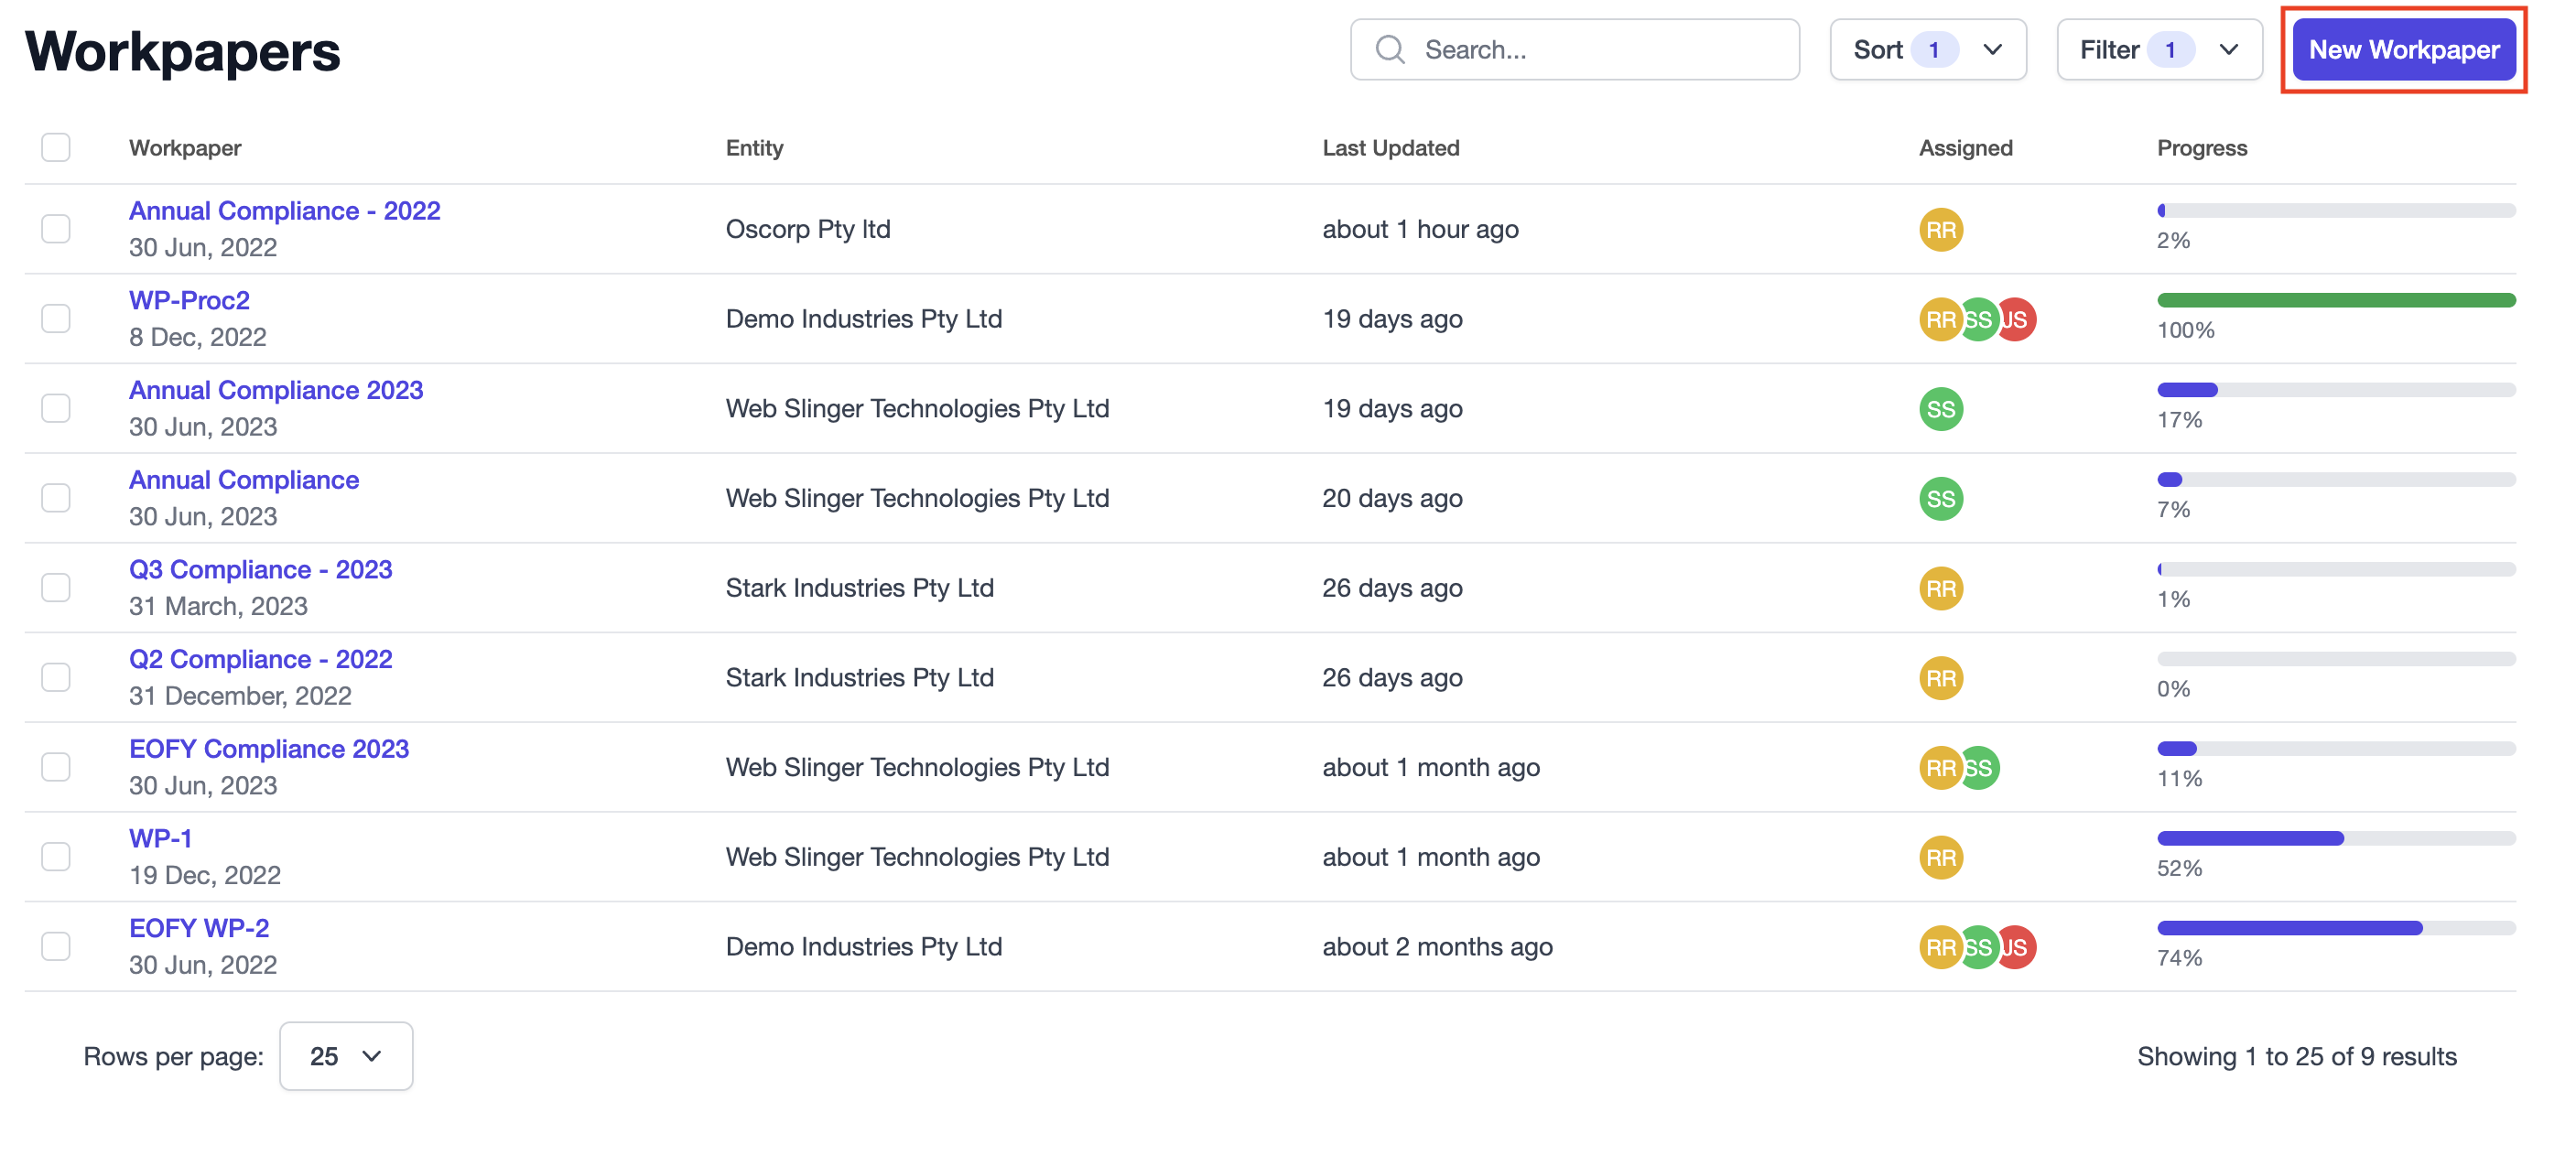
When you click the New Workpaper button you'll see the following form:
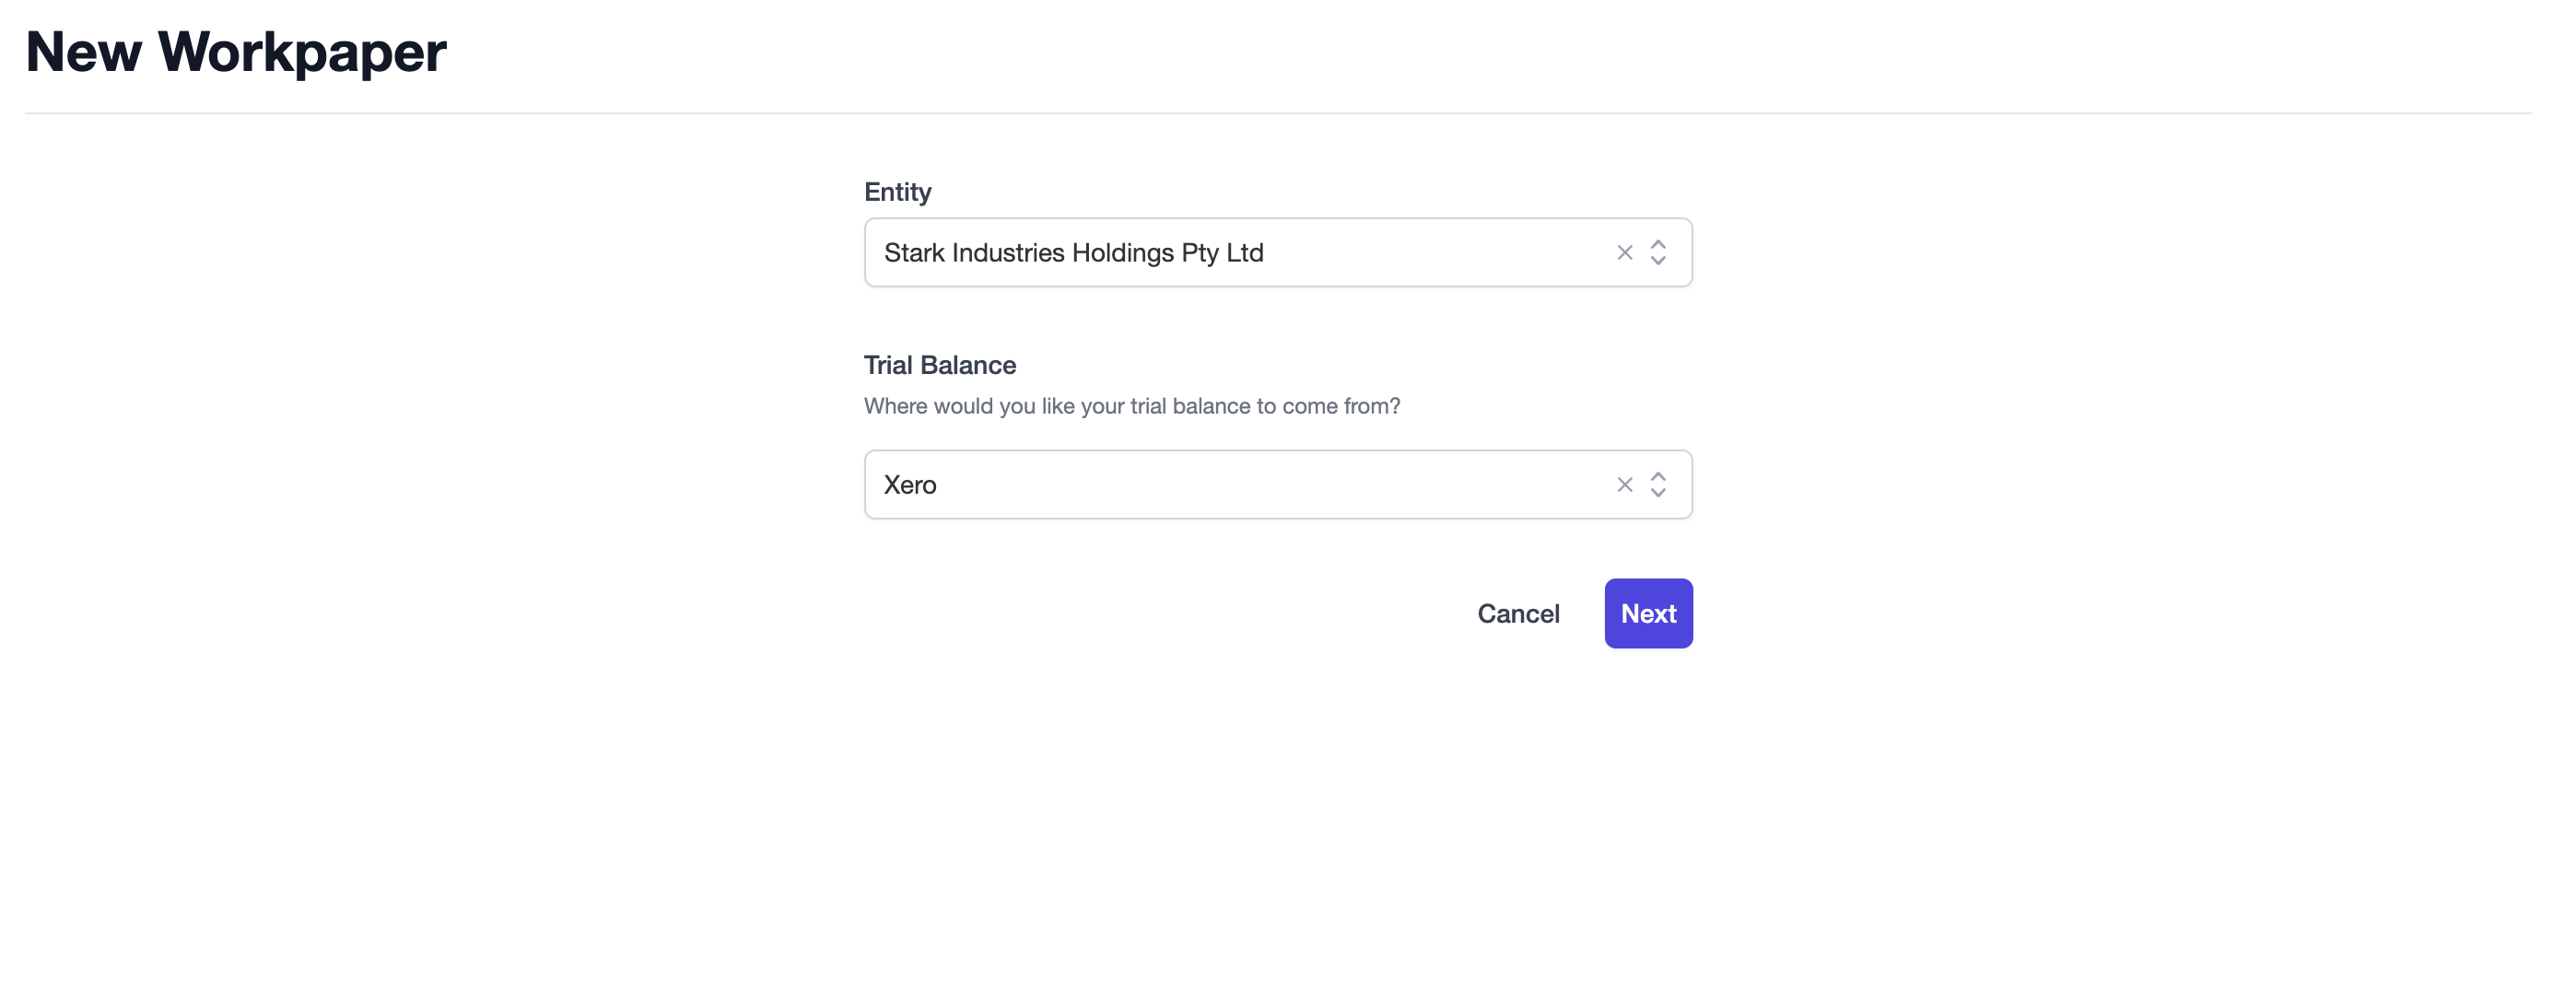
There a 3 steps in the standard workpaper form:
- Entity selection & trial balance source
- Workpaper information
- Assigning users
For entities connected to FYI Docs there will be an additional step to link your FYI Job with the workpaper. More information on this can be found in our FYI Docs article.
Step 1: Entity selection & trial balance source
The first step asks you to select the entity you'd like to create the workpaper for.
Note
If you create a new workpaper from the entity overview screen the entity will be pre-selected for you.
When selecting your trial balance source you'll have the option to select Xero or Import.
Import
If you select Import, you can download a trial balance csv template to be filled-out and uploaded.
The csv template will request the following fields be populated:
- Code: The account code (e.g. 200)
- Description: The account's description/name (e.g. Sales)
- Type: The account type (e.g. Current, Fixed)
- Class: The class of the account (i.e. Asset, Liability, Equity, Revenue, Expense)
- Report Code: A code to assist mapping the account to checklist items (e.g. EXP.DIS)
- Debit TY: The debit amount for the current year or blank
- Credit TY: The credit amount for the current year or blank
- Debit LY: The debit amount for the previous year or blank
- Credit LY: The credit amount for the previous year or blank
Once you have completed the csv you can upload it to the form. If there are any issues with the file we'll notify you on upload.
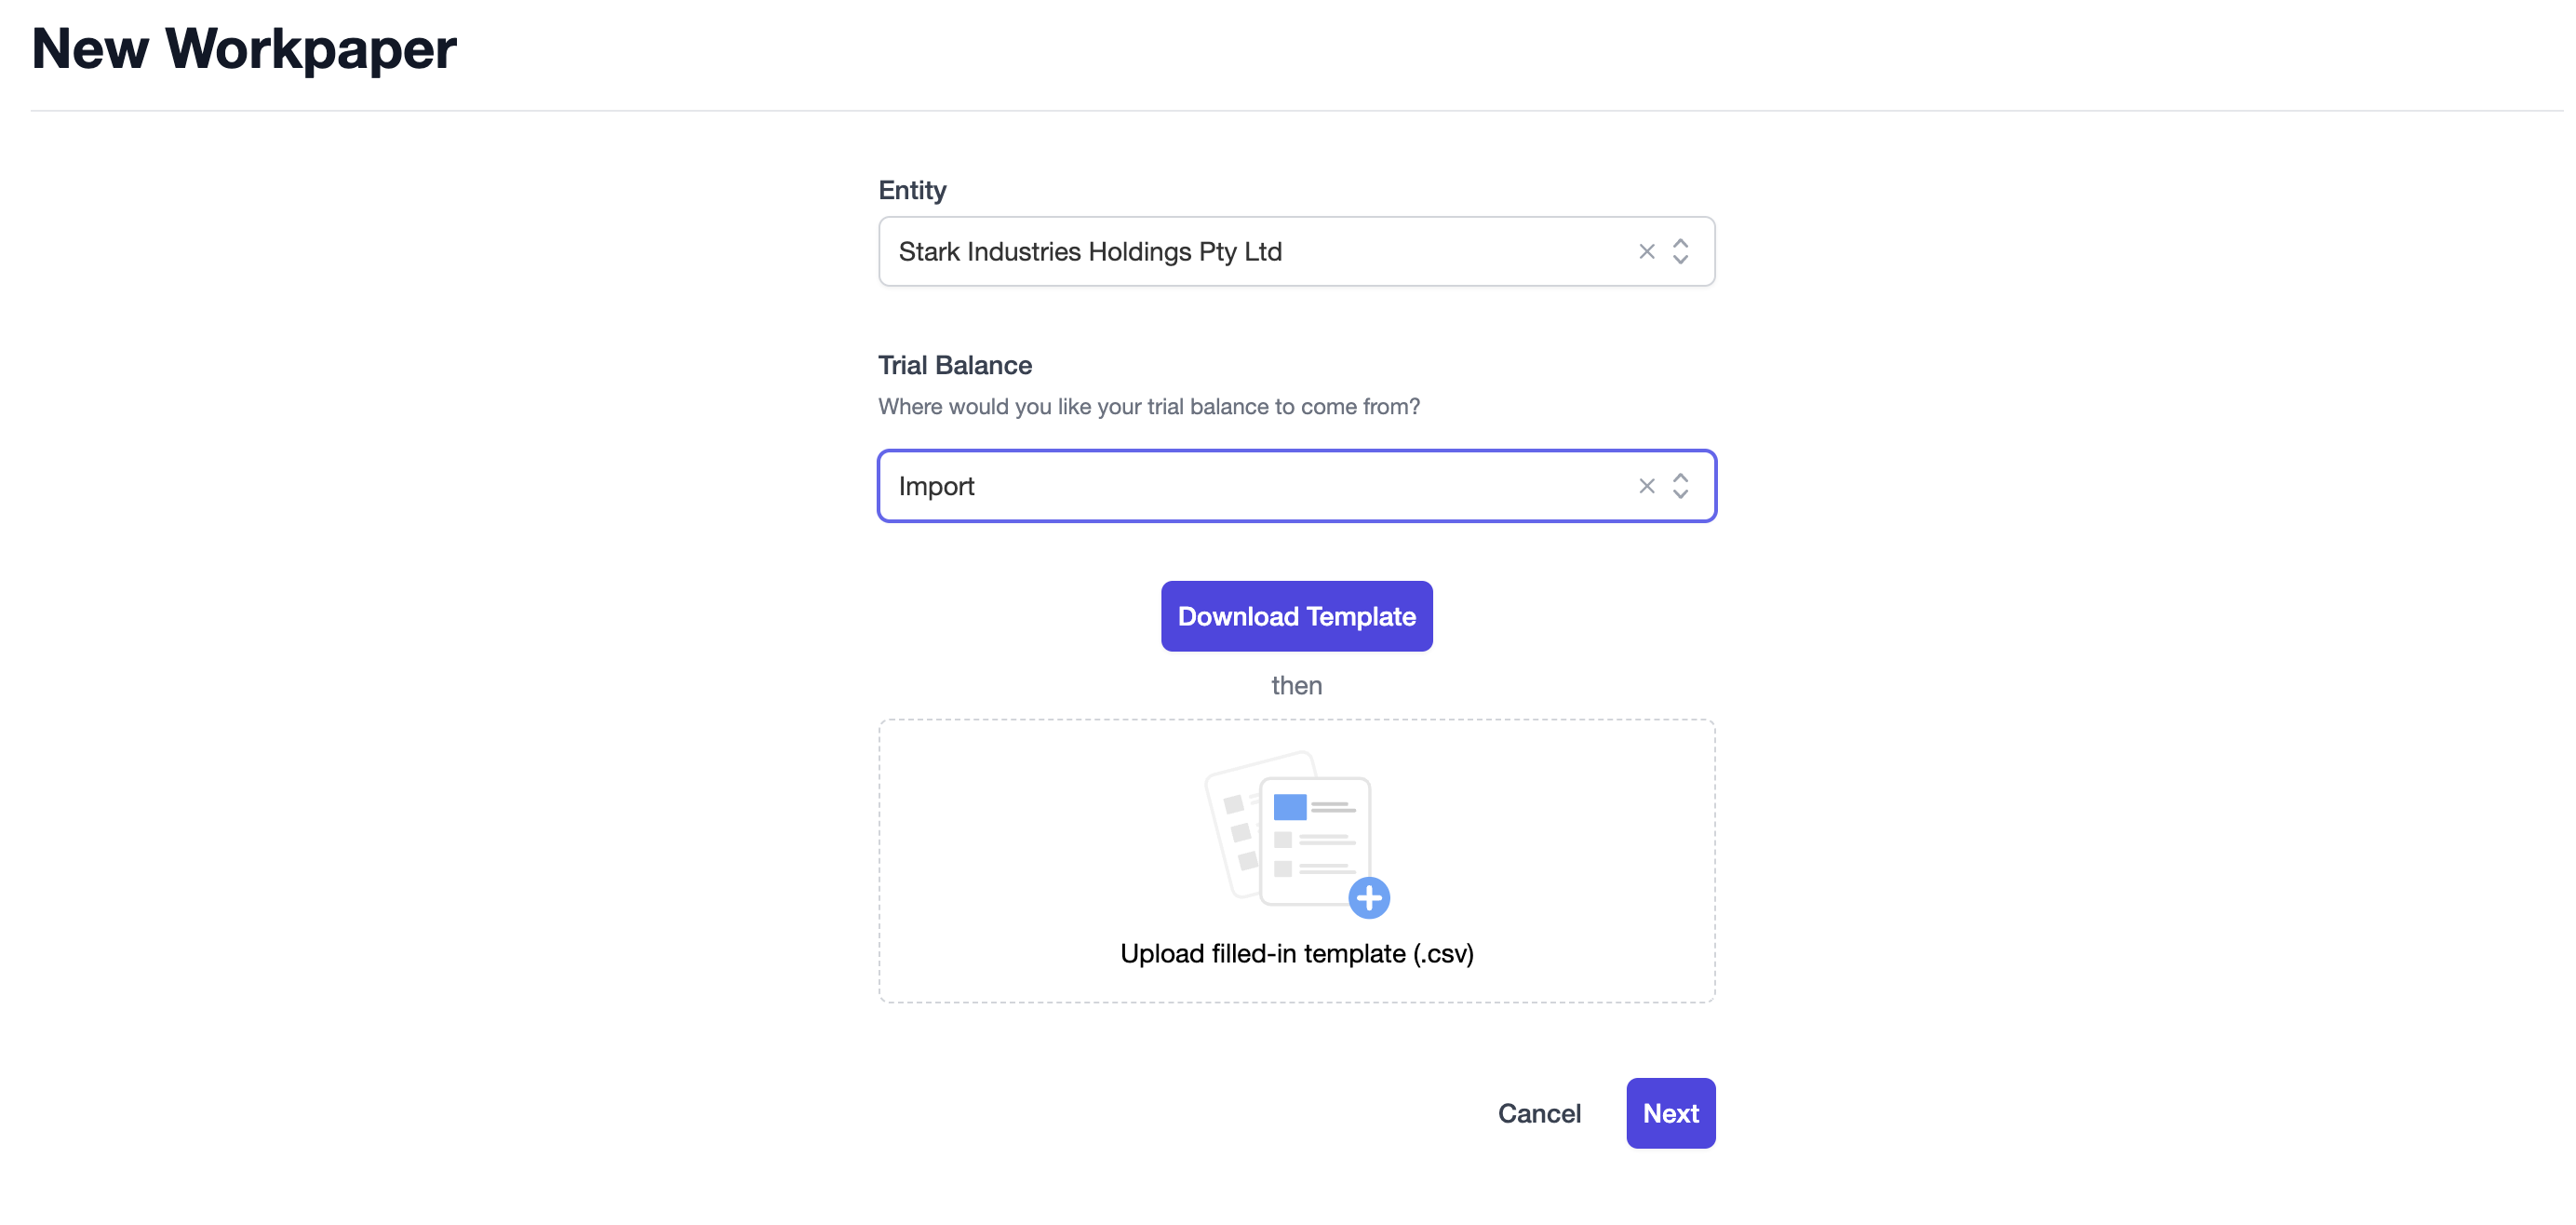
Xero
If you select the Xero option, you don't have to do anything further for this step and can go ahead and click the Next button to proceed to Step 2.
Note
If you have not linked the entity to Xero you will be unable to select Xero as an option.
As we add more integrations you may see additional sources appear in this section.
When you're finished and the upload is accepted, click the Next button to proceed to step 2.
Step 2: Workpaper information
Once you have completed Step 1 and clicked the Next button, you will see the following form:
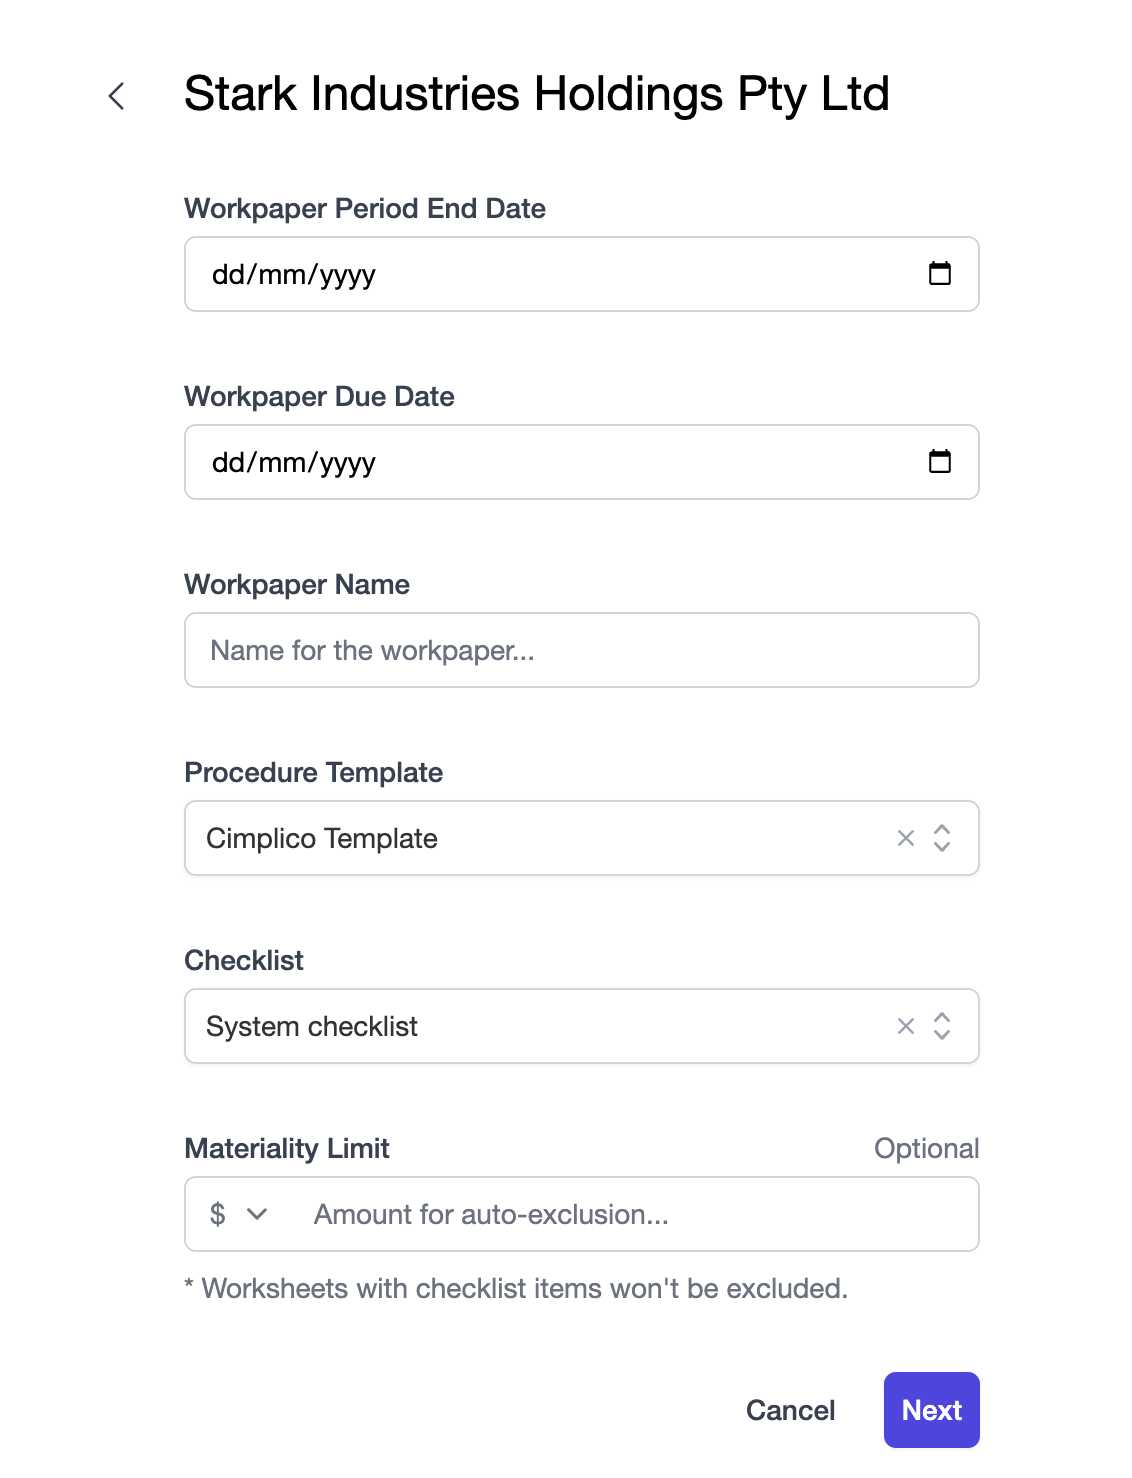
The following fields are required to configure the workpaper:
- Workpaper Period End Date: The end date the workpaper data relates to, starting from the financial year (e.g. If the entity has a 30 June FY end, and the Workpaper Period End Date is 31 December 2022, the current year data within the workpaper would be from 01 July 2022-31 December 2022)
- Workpaper Due Date: The ideal end date of the workpaper. This date is used for workpaper progress tracking shown on the workpaper dashboard. This is covered more in Dashboard.
- Workpaper Name: A unique name for your workpaper.
- Procedure Template: The procedure template to use for this workpaper
- Checklist Template: The checklist template to use for this workpaper.
- Materiality Limit (Optional): A monetary amount of the current year amount or percentage change from the last year amount to exclude (E.g. 5% materiality would exclude accounts that have a 5% or less change from the last year). This is the first of many planned rules to assist in filtering down the work to the most relevant items requiring your attention. We'll explore excluding accounts further in Trial Balance.
When the above information is completed, you can proceed to the last step: Assigning users.
Step 3: Assigning users
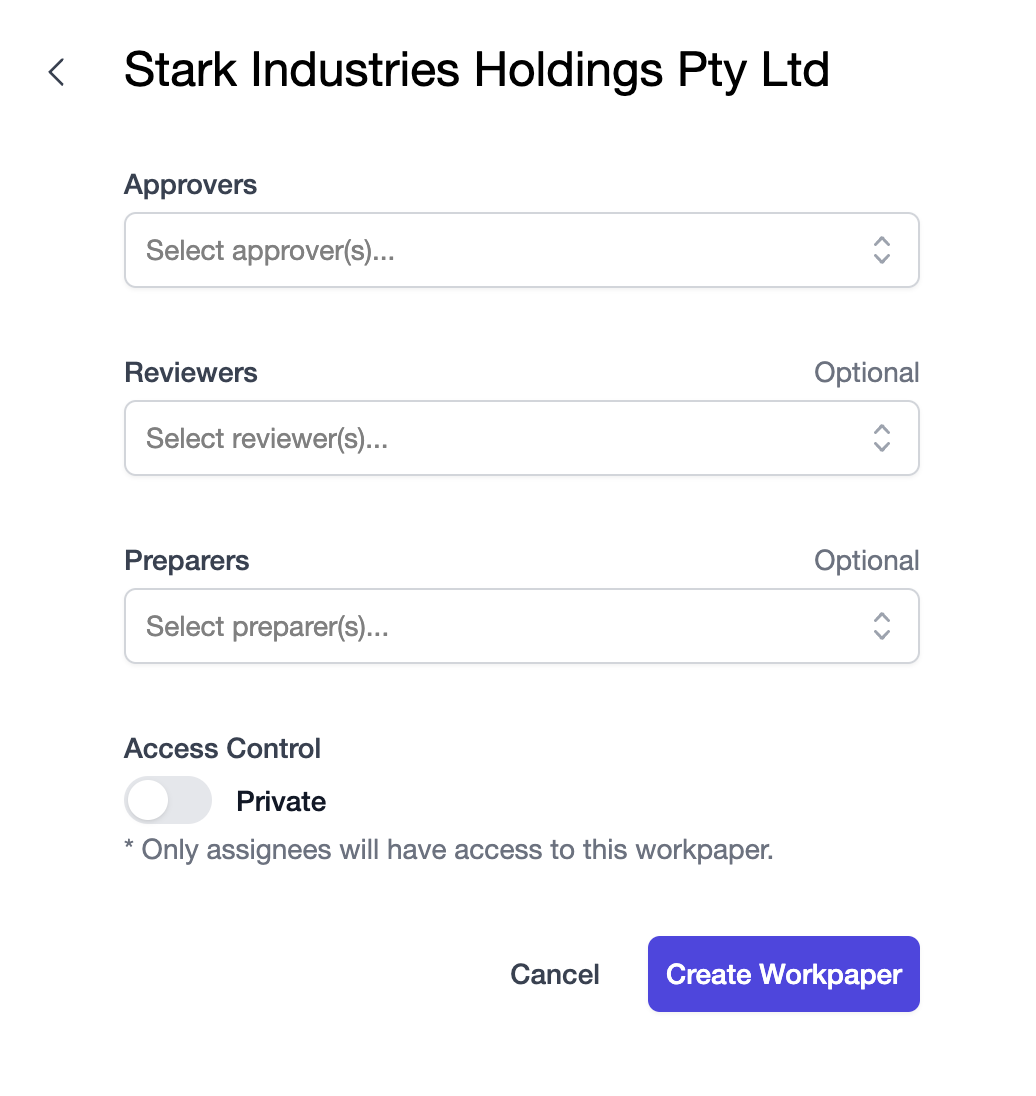
The final step is to assign staff to the relevant roles within the workpaper. In a workpaper there are 3 key roles:
- Preparer: One or more staff members responsible for preparing the workpaper, with no reviewing privileges.
- Reviewer: One or more senior staff responsible for reviewing the prepared work. Usually a manager in the firm.
- Approver: The final approver of the workpaper before it can be finalised and completed. Usually a partner of the firm.
With roles, the higher role inherits the privileges of the lower role, plus their additional privileges. Therefore:
- A reviewer can do everything a preparer can do, plus review worksheets and certify the workpaper as a reviewer.
- An approver can do everything a reviewer can do, plus approve a workpaper and certify the workpaper as an approver.
Note
Anyone can prepare a workpaper, whether they are assigned or not; however, the assigned preparers are the primary contact on the workpaper and are the only ones who can certify the workpaper as a preparer.
You'll be asked to select the roles for the workpaper.
Important
A workpaper requires a minimum of one approver.
Note
Assigning multiple users for a role is restriced to Essential and Professional tiers.
Once you've selected your approver(s), reviewer(s), and preparer(s) for the workpaper, you can go ahead and click the Create Workpaper button to be launched into it.
Congratulations, you've just created your first workpaper! 🎉
You're now ready to move on to the next course, where we cover all the aspects of a workpaper with examples to progress a job from its creation through to completion.